Hanging Copper Box - this was my Day #1

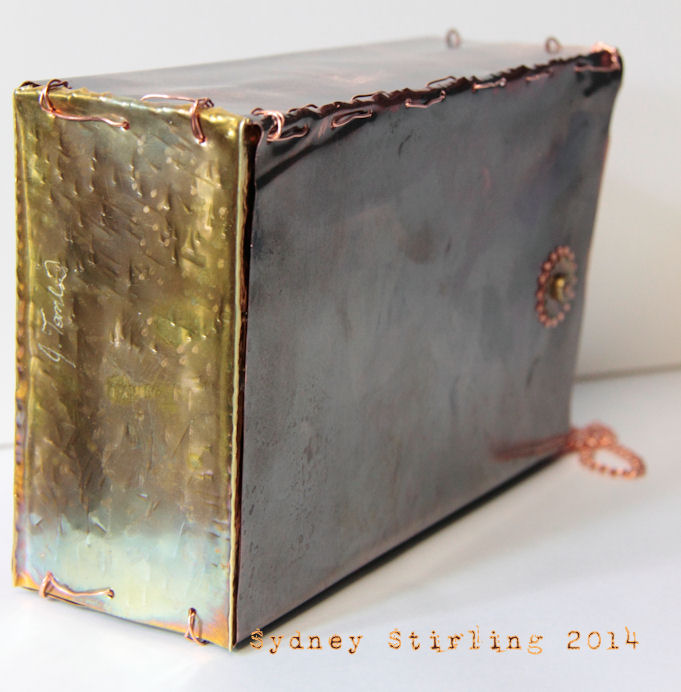
http://thingadayforever.wordpress.com/2014/02/01/thing-a-day-2014-day-1/
Day #2 - Finished Another Pair of Goggles (I now have about 15 - one for *every* occassion)
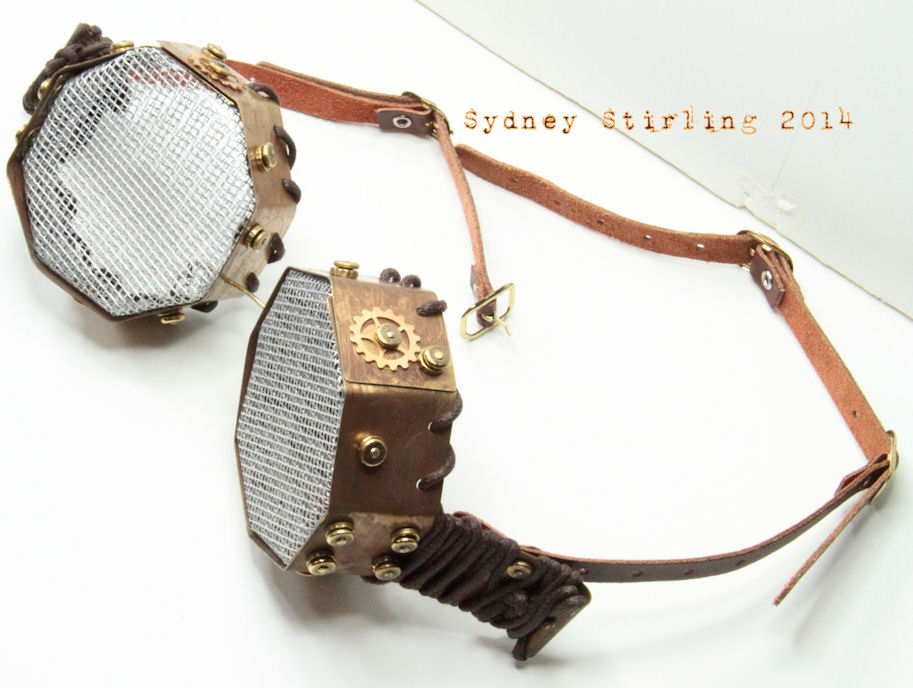
Strips of brass, cleaned, gear pattern drawn and etched, patinaed with flame, metal folded for 8-sided goggles – one inch overlap for stability. Sides add additional stability when worn.

Mesh folded, sniped, shaped, and formed. Sides curled to prevent sharp points from sticking out. Holes punched for riveting, and cord later on.
Riveted everything in place with brads and washers. Added waxed cotton cord for comfort when wearing and then inserted the nose piece.
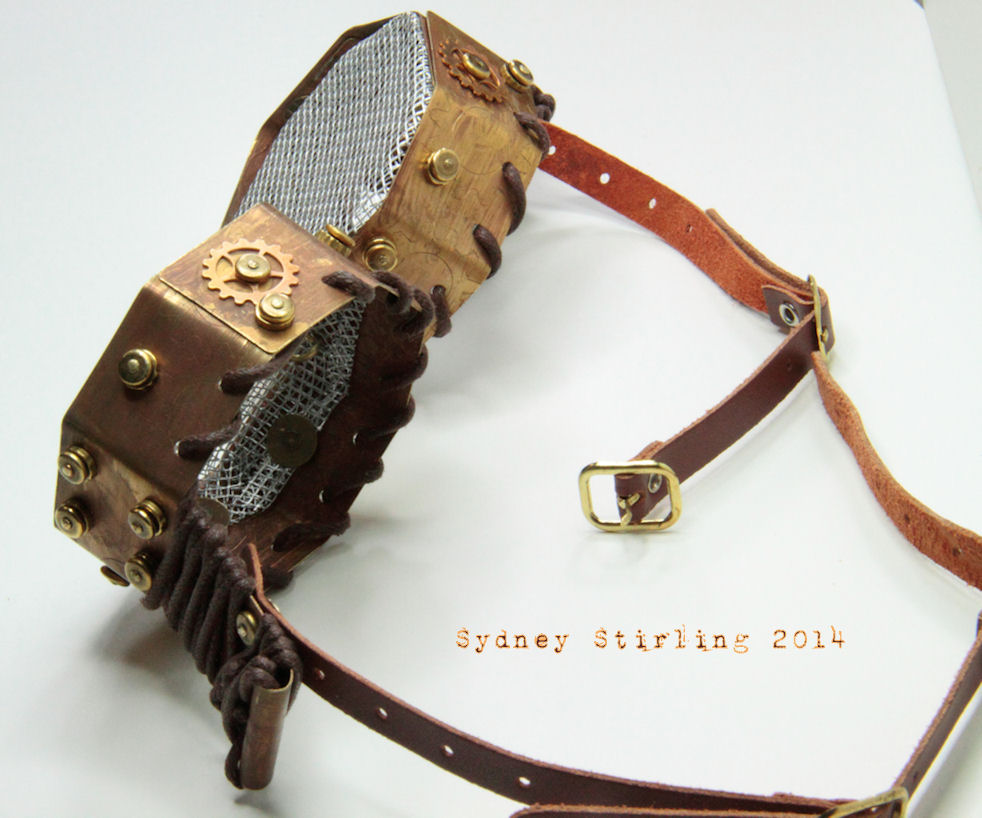 Riveted first straps onto sides, then added as needed to fit my head.
More can be added so goggles can be worn by different people, or worn on
a hat.
Riveted first straps onto sides, then added as needed to fit my head.
More can be added so goggles can be worn by different people, or worn on
a hat.http://thingadayforever.wordpress.com/2014/02/03/thing-a-day-2-steampunk-goggles/
Day #4 - I made a box to keep my pocket watches
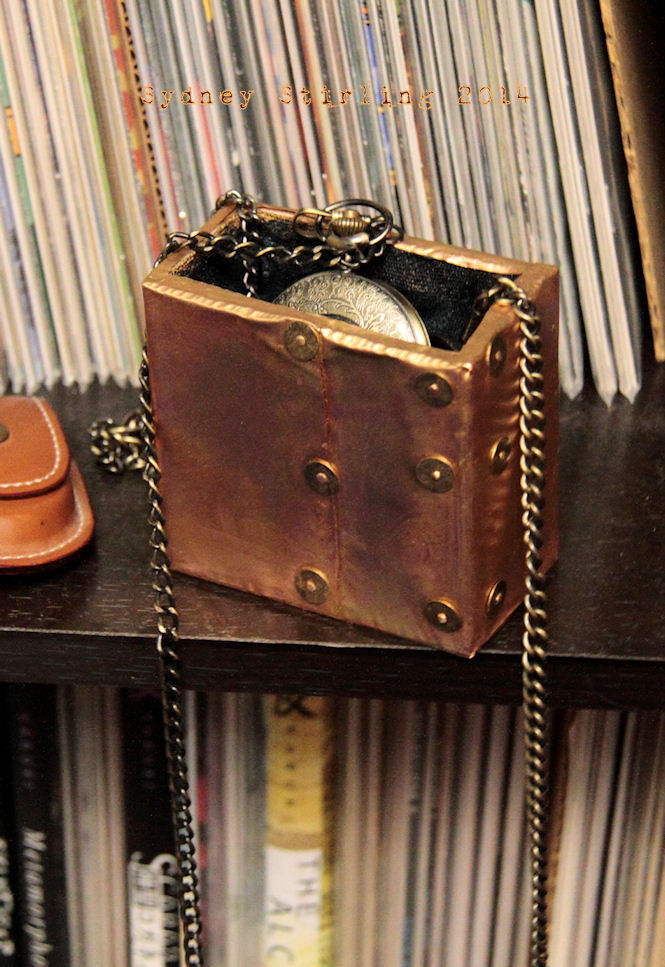
Built plywood skeleton, riveted copper sheets together, pasted cloth to interior (bottom and sides)
 ,
formed copper to skeleton, shaped sides to fit snugly, rubbed Inca Gold
and African Bronze wax onto surface for more depth (waited 10 minutes
and buffed).
,
formed copper to skeleton, shaped sides to fit snugly, rubbed Inca Gold
and African Bronze wax onto surface for more depth (waited 10 minutes
and buffed).Day 6 was Copper Leaves. I think the was the second time I did some during Thing A Day, and I did more later on, but I really liked this set.


http://thingadayforever.wordpress.com/2014/02/09/thing-a-day-bleated-day-6-more-copper-leaves/
Day 8 - Had me etching the Airship Noir on a metal disk.
http://thingadayforever.wordpress.com/2014/02/09/thing-a-day-belated-day-8-copper-coin-etch-dirigible/

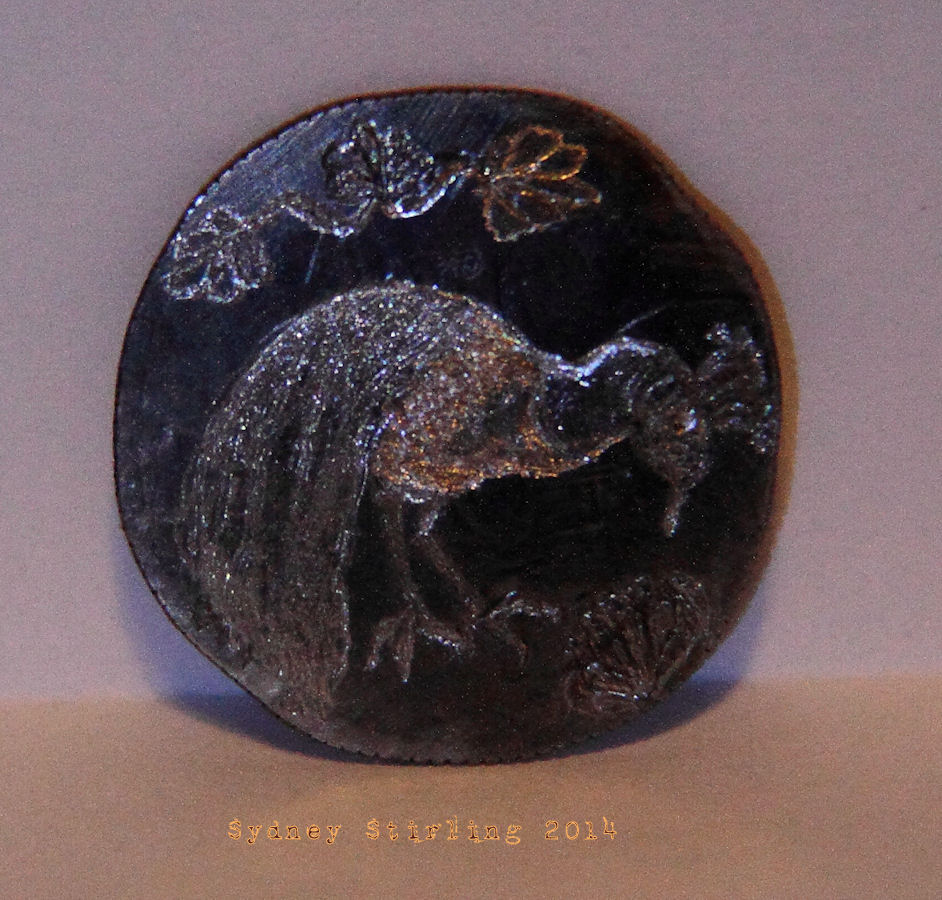
New sketch and etch for today – Peacock with flowers.
http://thingadayforever.wordpress.com/2014/02/16/thing-a-day-day-15-peacock-etch/
Day 20 - The last etch I'll share. I was very excited/relieved to catch on fairly quickly to physical etching since this is something I've been wanting to delve into.
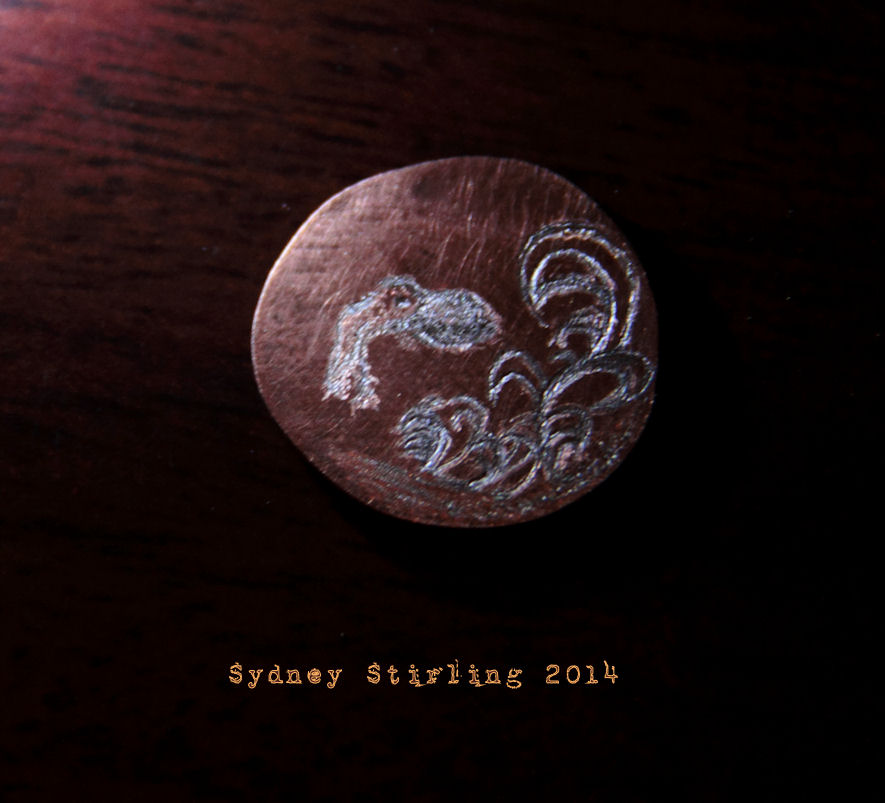
Etched a Dwarf Cuttlefish.
http://thingadayforever.wordpress.com/2014/02/21/thing-a-day-day-20-copper-sheet-patina-and-etch/
Day 24 - Did a short blog on how I am patinaing my copper sheeting for a large copper box I'm constructing for my Steampunk excursions to ComiCons.
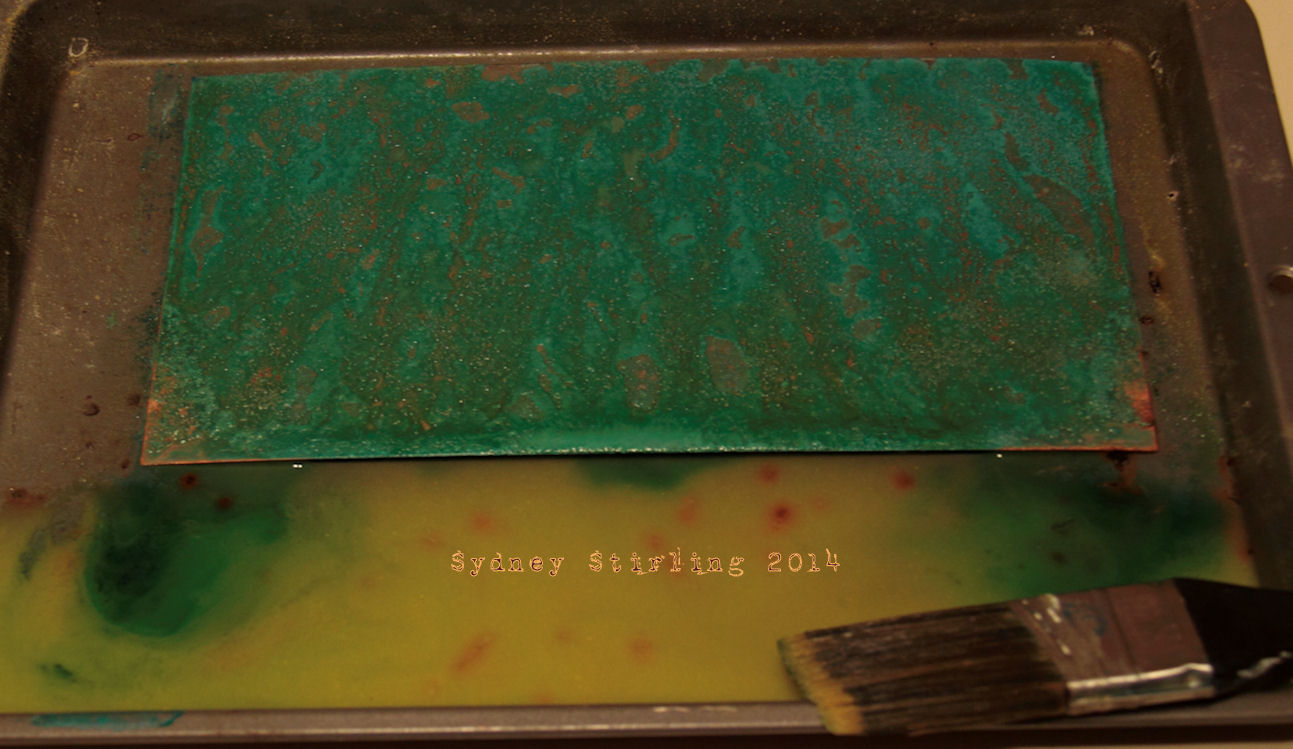
My process is pretty simple, just takes time. Take your copper and clean all the dirt and oils off. I wear latex gloves when I do this so my skin doesn’t re-deposit oils. I use a scrubbing pad with a gentle scrub cleaner, and then baking powder with a half lemon. Do not use steel wool – it has oils in the metal fibers that will deposit back on the copper. A clean surface will take the chemical reaction to patina – oils will resist. *forgot to add- I take some sandpaper and rough up my surface. It will help the patina scales adhere better and will give more surface for the chemical interactions to work.* Once clean and the water sheets off, I start my process. You can leave the copper wet or let it dry – every time you do a patina, it will be different and every little variation in the environment can alter your results. This is the fun for me. For my box, I’m using a solution of white vinegar, ammonia, salt, and a little mustard. I let the solution wash over the sheet in a tray, then tilt to let the oxygen go to work. Maybe I’ll play around once or two – let some solution drip off my brush and wash off the green scale. A slow patina will last longer, so this isn't a one hour process. For this batch, I let them sit for 24 to 36 hours. I could do longer, but I've decided this is the look I want for this project.
Once I've decided I’m done, I pick up the copper and with a soft scrub, I wash off the green scale. It’s soft, and when dry, would fall like powder. Under that is what I want.
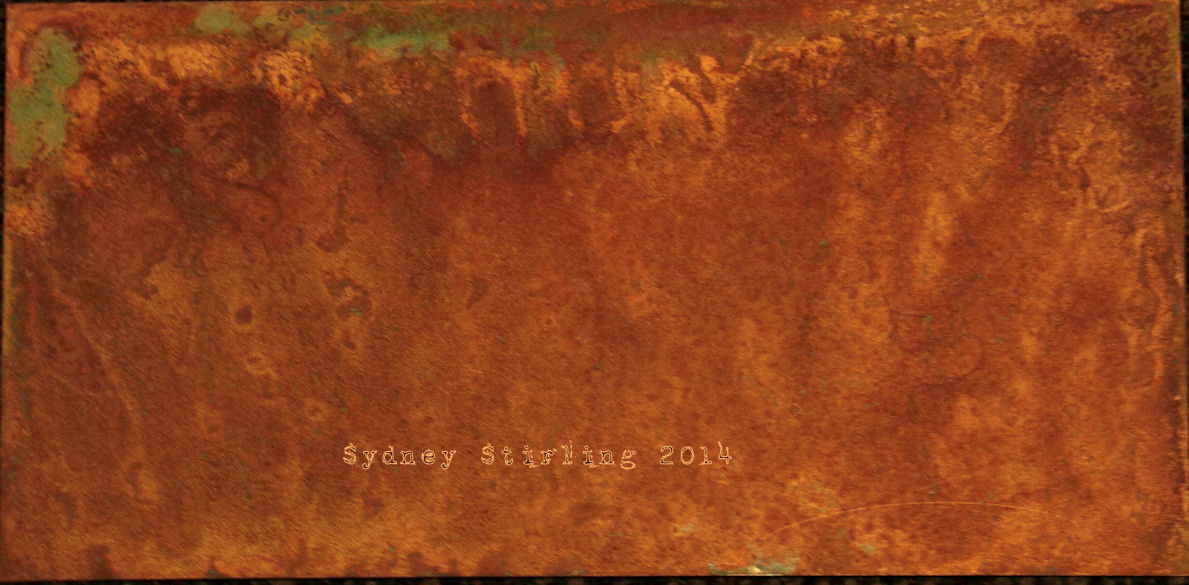
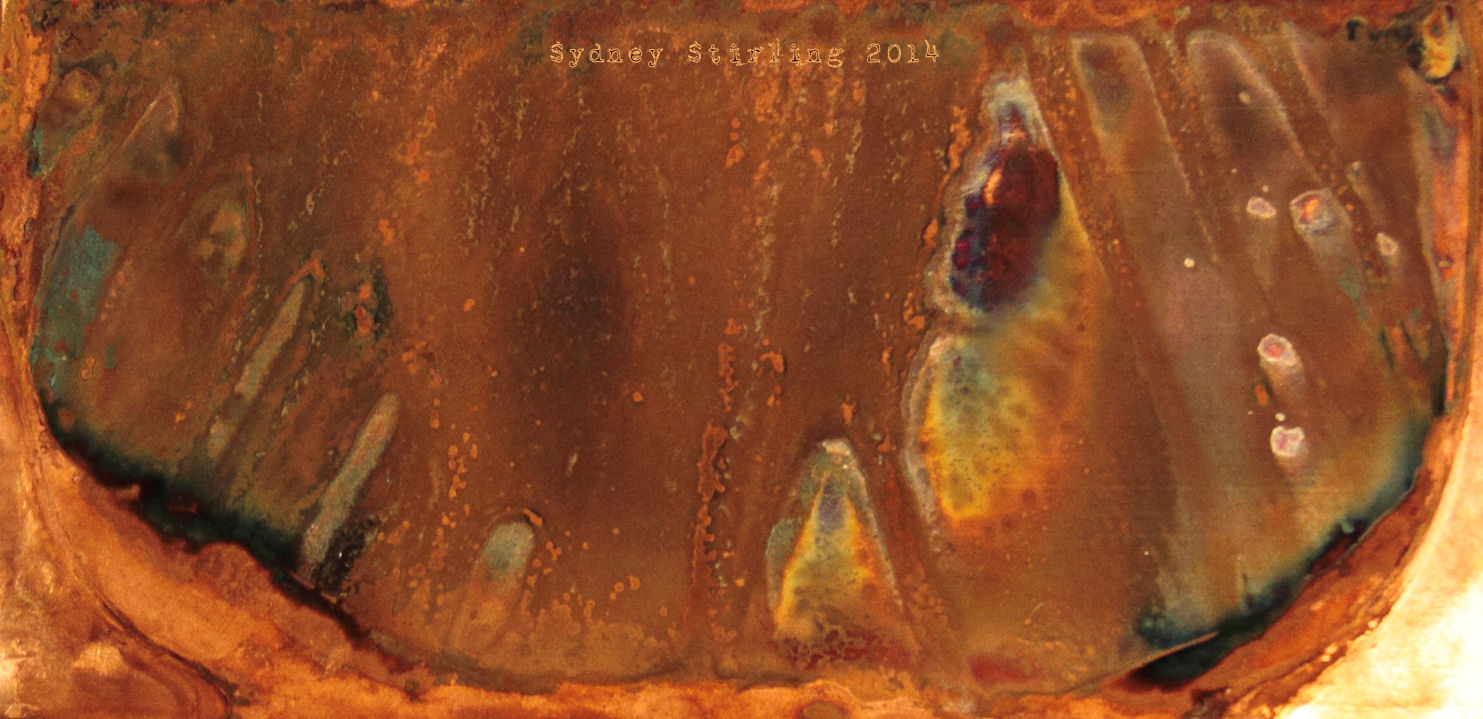
I get some subtle color shifts as well as some of those blues and purples. Before I start riveting all my sheets together, I’ll give each a quick clear coat. All I’m doing is slowing down the oxidation process now. I’m just starting and stalling the process more on my own terms.
http://thingadayforever.wordpress.com/2014/02/25/thing-a-day-24-more-copper-sheet/
More entries after Planet ComiCon the 14-16th of this month!
-Sydney Stirling, House Dirigible
https://www.facebook.com/sydney.stirlinghousedirigible
1 comment:
Were those metal sheets just hanging around at your house? Not only had you reduced clutter by making this holder, but you also made a place to store all of your other stuff. That's neat! The rest of your creations are awesome. I particularly liked the googles. I hope you keep sharing more of your works here. Cheers!
Brandi Bradley @ Rotax Metals
Post a Comment